3.1 Checklist
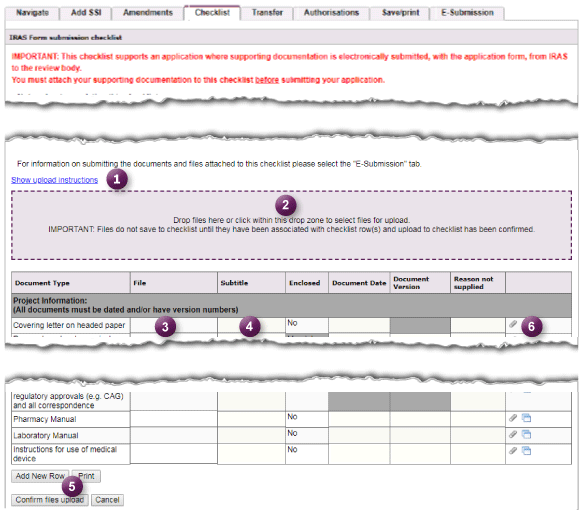
![]() To explore key areas of a checklist that is enabled for electronic submission please select one of the numbers below:
To explore key areas of a checklist that is enabled for electronic submission please select one of the numbers below:

Applications to review bodies require submission of a completed application form and specific supporting documentation. IRAS generates a checklist associated with each form which outlines the required supporting documents.
The functionality on this tab and the way you complete it depends on whether your application is enabled for electronic submission.
Forms that are enabled for electronic submission – uploading to the checklist
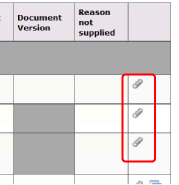
Where applications are submitted electronically, supporting documents are added using the multiple file upload functionality or the paperclip icon.
![]() IMPORTANT : When using the multiple file upload function, after you have assigned all files and completed the document properties you should scroll to the ‘Confirm files upload’ button at the bottom of the checklist (button 5 in screenshot) to confirm the upload of the files to the checklist. If you do not click this button the files will not be attached to the checklist.
IMPORTANT : When using the multiple file upload function, after you have assigned all files and completed the document properties you should scroll to the ‘Confirm files upload’ button at the bottom of the checklist (button 5 in screenshot) to confirm the upload of the files to the checklist. If you do not click this button the files will not be attached to the checklist.
Uploading updated documents to the checklist
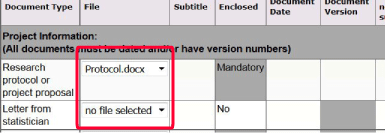
To upload a new version of a document to the checklist, you follow the same steps as before, either dragging the file to the drop zone, or clicking the paperclip icon for the relevant checklist item. You do not need to remove the superseded file. You then enter the version number and date. The updated document will then appear in the checklist. All previous versions of that document will remain attached to that checklist item, and can be viewed and opened by clicking the ‘+’ icon or hidden using the ‘-‘ icon in the ‘file’ column ![]() .
.
Checklist completion for applications that are not being submitted electronically
For applications that are not being submitted electronically, you will not see the drop zone for file upload or paperclip option. In this case you should complete the checklist form with details of all supporting documentation then save/print and send a copy of the completed checklist alongside your application form and all required supporting documents by post or email to the reviewing body. If you do not, your application may be rejected and/or review of your application may be delayed.
Checklist tips:
- Make sure all of your documents have sensible filenames/titles (so that they can be easily identified).
- Make sure all your documents have a version number or a date in a running header or footer. This will help you later if you need to submit any amended documentation to review bodies. The submission checklists ask you to indicate the version of each document you submit.
- It's a good idea to complete the version details within each Checklist, so that you can see at a glance which version of each document was submitted for your application.
- You will usually find some items in the checklist marked as ‘Mandatory’. For these items make sure you have either provided a document or entered a reason that it is not required.


